What Is a Woodworking Bench? A Simple Guide

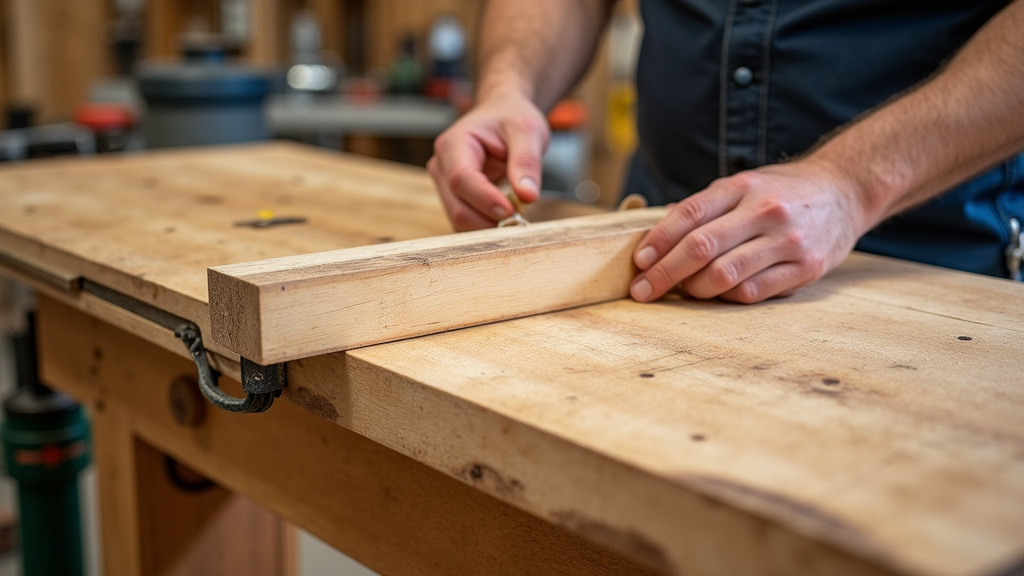
A woodworking bench is a sturdy work surface designed specifically for woodworking. It provides a stable, durable platform to cut, join, and shape wood projects. You can think of it as the central hub of any workshop.
Unlike a regular table, a woodworking bench includes features like clamp-down mechanisms and a solid top for heavy work. We found that these benches are built to handle the force of sawing and chiseling. They often have space to hold traditional hand tools right where you need them.
- It’s the essential work surface for any wood project.
- Built to be extremely sturdy and durable.
- Often includes vises and clamps to secure your wood.
- Differs from a regular table by being designed for force and precision.
- A key piece of equipment for both beginners and experienced woodworkers.
Below, we’ll walk through exactly what makes a woodworking bench special and how to choose one for your needs.
Understanding the Woodworking Bench: Your Workshop’s Core
A woodworking bench is your project’s best friend. It’s a **specially built table** that gives you a rock-solid surface for every task. You’ll clamp your wood to it, hammer on it, and saw against it. Think of it as a **dedicated assistant** that holds your work steady so you can be precise. It’s not just furniture; it’s a foundational tool.
While a kitchen table wobbles when you saw, a proper workbench stays put. Its mass and design absorb the shock of your chisel and the pull of your saw. This stability is what lets you focus on your craft, not on fighting your workspace.
Key Features That Define a Real Workbench
What makes it more than just a thick slab of wood? We found a few non-negotiable features that separate a true woodworking bench from a simple work surface.
- A Heavy, Solid Top: Often made of laminated wood, it’s built to resist denting and vibration.
- Vise(s): A front vise and/or a tail vise are built-in clamps to hold your project firmly.
- Dog Holes: A row of holes for inserting “bench dogs” to help clamp irregular shapes.
- Sturdy Base: A robust frame with stretchers prevents racking (side-to-side wobble).
The Anatomy of a Woodworking Bench: Parts and Purpose
Let’s look under the hood. A bench isn’t one piece; it’s a system of parts working together. Knowing these helps you understand what you’re buying or building.
The Bench Top: Your Main Stage
This is where all the action happens. The top must be **flat, thick, and durable**. Many benchtops are around 3 to 4 inches thick. A heavy top provides the mass needed for hand tool work. It also gives you room to arrange your tools and project.
Hardwood vs. Softwood Tops
Maple, beech, or ash are popular hardwoods for tops. They are tough and resist dents. Some benches use construction-grade lumber like pine. This makes them more affordable but softer. We found that a softer top will show more dents and scratches over time.
The Base: Your Bench’s Foundation
The base connects the legs and supports the top. A good base has **sturdy legs** and **horizontal stretchers** near the floor. This creates a rigid frame that doesn’t rock. Without a solid base, even a great top will be unstable.
Common Types of Woodworking Benches
Not all benches look the same. The style often matches the type of woodworking you do. Here are the most common designs you’ll encounter.
The Traditional Joiner’s Bench
This is the classic, heavy bench with a thick top and vise(s). It’s designed for **hand tool work**—sawing, planing, and chiseling. Its mass keeps it steady while you work. It’s the versatile standard for many furniture makers.
The Single-Sawbench or Low Bench
Imagine a low, simple bench. You often kneel on it or use it at a low height. This style is excellent for **planing long boards** and breaking down large pieces. It’s common in Japanese woodworking traditions. It’s also easier and cheaper to build yourself.
How to Choose the Right Woodworking Bench for You
Choosing a bench depends on your space, budget, and how you work. Don’t just buy the biggest one you find. Consider these practical factors first.
1. What Will You Build?
Are you building small boxes or large tables? A bench for small crafts can be smaller. For furniture, you need a **larger work surface** to support big panels. Your projects dictate the minimum bench size you need.
2. Hand Tools vs. Power Tools
Do you love hand planes and chisels? You need a **heavy, traditional bench** with vises. If you mostly use a table saw and router, a simpler bench might suffice. It’s more about a stable surface for assembly. Some woodworkers use a **customized assembly table** instead.
3. Size and Space Constraints
Measure your workshop carefully. A standard bench might be 6-7 feet long and 24-30 inches deep. Will it fit in your garage? Is there room to move around it? Consider a **fold-down or mobile bench** if space is very tight.
Building vs. Buying: A Practical Comparison
This is a classic dilemma. Should you buy a ready-made bench or build your own? Each path has clear advantages and drawbacks.
| Factor | Buying a Bench | Building Your Own |
|---|---|---|
| Cost | Higher upfront cost. Can range from a few hundred to several thousand dollars. | Often cheaper in materials. Cost depends on wood choice and hardware. |
| Time & Skill | Immediate use. No time spent building. Requires only your money. | Requires time and basic woodworking skills. You’ll learn a lot in the process. |
| Customization | Limited to available models. May not perfectly fit your needs or space. | Total control over size, features, and layout. Make it perfect for you. |
| Potential Quality | High-quality commercial benches are expertly crafted and very durable. | Quality depends on your skills and materials. Can be excellent with care. |
A Good Middle Ground: The Kit
We found a helpful option for many: the **workbench kit**. You get pre-cut wood and all the hardware. You still do the assembly. This saves time on design and sourcing. It also teaches you construction basics without starting from scratch.
Your Essential Woodworking Bench Checklist
Before you decide, run through this quick list. It will help you focus on what really matters for your workshop.
- ✅ Stability Test: Does the bench feel solid and heavy, or light and wobbly?
- ✅ Vise Quality: Are the vises sturdy? Do they open wide enough for your typical boards?
- ✅ Surface Flatness: Is the top flat and true? A simple straightedge can check this.
- ✅ Height Comfort: Is the height right for you? (A common guideline is to the height of your palms when your arms are relaxed.)
- ✅ Storage Options: Does it have shelves, racks, or holes to hold your tools and keep things organized?
- ✅ Mobility Needs: Do you need it to be on locking casters to move around your shop?
Material Matters: What’s Your Bench Made Of?
The material determines your bench’s weight, durability, and cost. Here’s a simple breakdown of common choices.
Solid Hardwood (The Premium Choice)
Benches made of **maple, beech, or oak** are the gold standard. They are incredibly strong and heavy. This weight is perfect for absorbing tool impacts. They can last for generations with proper care.
Construction Lumber & Plywood (The Budget-Friendly Build)
Many DIY benches use **dimensional pine or fir** from the hardware store. You can also use a plywood top over a solid frame. This is a very practical and affordable approach. Your bench will be functional and sturdy, even if not as heavy as a hardwood one.
Metal or Hybrid Frames
Some benches have a **steel tube frame** with a wood top. This can be an excellent, ultra-sturdy combination. The metal frame prevents any possibility of racking. It’s a great option if you need a bench that will never move.
Setting Up Your Bench: The First Crucial Steps
You got your bench—great! Now, how do you set it up right? These first steps make all the difference in your daily use.
Leveling is Everything
Your bench must be perfectly level. An uneven bench will cause your projects to slide or rock. Use a **good spirit level**. Adjust the feet or add shims until it doesn’t rock in any corner. This takes 10 minutes and saves hours of frustration.
Adding a Bench Top Surface
Consider adding a **sacrificial top layer**. This is a thin, replaceable piece of MDF or plywood on top of your main bench. You can screw into it, glue on it, and spill finish on it. When it gets too chewed up, just replace it. It protects your good benchtop.
Organizing Your Work Zone
Think about workflow. Keep the most-used tools **within arm’s reach**. Install a simple shelf or use a tool tote on the bench. The goal is to minimize walking across the shop for a screwdriver or pencil. A clean, organized bench helps you work smarter.
Maintaining Your Woodworking Investment
A good bench, like any tool, needs occasional care. This isn’t complicated, but it will extend its life.
Routine Cleaning
At the end of a project, sweep off the sawdust and chips. A **stiff bench brush** is
Conclusion
A woodworking bench is more than just a table; it is the dedicated foundation for your craft. You now know its essential features, like a heavy top and secure vises, and the main types that suit different work styles. Choosing the right one comes down to matching your projects, space, and budget. Remember that a sturdy, stable surface is your most important partner for precise and enjoyable woodworking.
Take the next step by carefully measuring your workshop and reviewing the checklist in this guide. A well-chosen bench will serve you for years, so take your time to make a thoughtful decision. Your future projects will thank you for it.
Frequently Asked Questions
How much should a beginner expect to spend on a first woodworking bench?
For a beginner, a solid, functional bench can range from $300 to $800. We found that a quality bench kit or a well-built DIY bench from construction lumber is often the most cost-effective start. Avoid the cheapest options, as they typically lack the necessary stability for real work.
Can I just use a sturdy folding table or a workmate instead of a real workbench?
You can certainly start with a portable workbench or a heavy table for light tasks and assembly. However, these lack the mass and built-in vises needed for hand tool work like planing or chiseling. They are a good temporary solution but will limit you as your skills grow.
What is the ideal height for a woodworking bench?
The classic rule is that the top should reach your wrist bone when you are standing straight with your arms relaxed at your sides. This height allows you to use hand tools effectively without hunching over. For most people, this falls between 34 and 38 inches from the floor.
Do I need a bench with a tail vise and dog holes?
A tail vise and dog holes are extremely useful for clamping boards flat on the benchtop for planing. If you plan to do a lot of hand tool work, they are highly recommended. For power tool assembly or general glue-ups, a front vise alone is often sufficient.
How can I make my woodworking bench more mobile in a small shop?
We found that adding heavy-duty locking casters to the base is the best solution for mobility. You can also design or buy a bench with fold-down legs. The key is to ensure the bench is absolutely stable and locked in place before you begin any work.